Creative Commons copyright
Where would first look for a picture or song if you wanted to insert it into one of your presentations, blogs, websites or anything done by you? I think most of you would go to google images or download a song from the internet. This could have its consequences though. Many don’t know the rules of copyright on the internet and because of this lack of interest in the rules of copyright many could face severe consequences.
One great way of avoiding copyright issues is Creative Commons (http://creativecommons.org/). Here is one video which is quite self-explanatory (there are 2 and I will show both of them because they give different information but I’ll begin with this one because I think it more fun and it’s easier to understand what Creative Commons has to offer):
The main idea is that Creative Commons can tell you what you CAN and download legally and how you can use it for personal use.
This is a video with a more general explanation of Creative Commons:
It’s really easy to embed a Creative Commons license to your blog, website or to any of your work. I’ll just refer to how you can do this on your blog and give further links to other blogs and sites where you can find more information on how to get a license.
How to get a Creative Commons license on your blog (on wordpress – I will research how to do it on blogspot also in the upcoming days and post about that too)
How to start?
First you have to have your blog ready for use. So you have to have it up and running.
The next step is to visit the Creative Commons site (http://creativecommons.org/). On the right side of the site you will see the word ‘License’ – now click on it.
After you’ve clicked on the button this site will appear:
 As you can see for yourselves the steps towards creating your own license are pretty straightforward. There are two main questions asked from you. Do you allow commercial use of your work? If yes, it means that people can sell your work and make money out of it….if they can 🙂 The other questions is whether you allow people to modify your work or not. If you allow them to do this, they are given permission to use it, cut it, ‘remix’ it (as said by the folks at Creative Commons), share it and so on. However, for further specific information about the different types of licenses watch the first video in the post or if you want something more serious then you should read the information on the following site carefully: http://creativecommons.org/about/licenses
After you carefully read the types of licenses go back to the 2 questions, answer them accordingly to your copyright intentions and press ‘Select a License’ button at the bottom of the page:
 You can probably see that there are also some optional fields you might want to think of filling in. I filled in all but the last two (I put nothing to ‘Source work URL’ – because I don’t use anyone’s work for the basis of mine and no ‘More permissions URL’ either)
1. At the 1st section (the Format section) choose the type of your creative work. In this case you should choose ‘Text’ because I’m referring here to a blog. If you’re licensing a song, video or anything else…well then just choose that 🙂
2. You could also give a title to your work if you haven’t got one yet
3. You might want to enter your name so that the person who uses your blog will attribute the work to your name and not his/her’s. This will appear in your license. This is what appears in my blog under the CC license:
‘Technologies inside and outside the classroom by Straub Roland is licensed under a Creative Commons Attribution-NoDerivs 3.0 Unported License.’
4. You can add the URL to your site and your work will then be attributed to that URL and if you have your name typed in also then both will appear in the license description.
5. Here you can just insert the URL of your work’s source. It means if you used someone’s blog to create your work then you should insert the URL of that blog into this section.
6. This section is quite self explanatory. Just by clicking the information button on the right side of each of these section you will get a short explanation for each of them. This is what it says for this section: ‘A URL where a user can obtain information about clearing rights that are not pre-cleared by your CC license.’
The text for the license
When finished, you should get a text (code) which you will have to copy into your blog. The code will look something like this:
 You will get a clear description of the license of your choice. In this case (as an example) you can see that it says ‘Creative Commons Attribution-NonCommercial-ShareAlike 3.0 Unported License’. You can have different types of combination between the licenses…it really depends on how restrictive you want to be (read about the types of combination you can have or watch the first video in the post).
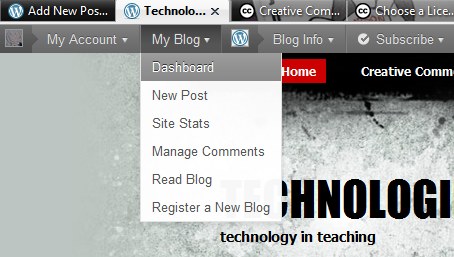
Now go to your blog and press the dashboard button on the top of your screen in your wordpress blog:
 When in your dashboard go to your widgets. You can find them under the ‘Appearance’ section:
 When you press on the widgets button you should be able to see different types of widgets which you may embed into your blog. Find a Text widget such as this (see picture).
Drag the widget to the right side of your screen and drop it unto your sidebar. When ready, open the widget, type in a title such as ‘Creative Commons License’ and copy the text/code that Creative Commons has generated for you when choosing your license into the text widget.
Copying the text
Just select the text in the Creative Commons site by pressing Ctrl+A (to select all) on your keyboard – or select all the text with your mouse, right click and select Copy – and then go to the Text widget, click on the blank space and press Ctrl+V (to paste the text/code into the blank space) – or click on the blank space, press right click on your mouse and press Paste. When finished, press the Save button on the widget and close it.
This is how you should see the Text widget in the dashboard in the sidebar without text:
And this is how you create your own CC license 🙂
As you can see it’s easy to make and you can rest more easily from now on knowing that your works can’t be used for any reason you don’t want it to be used.
In case you’re using your blog for educational reasons it is good to know that your work can’t be transformed into a circus show without your permission:) So feel free to experiment on using Creative Commons as a search engine whenever you’re looking for new photos, songs, videos or anything else you want to use legally. You could also share this with your students and make them aware of all the copyright issues they could have if downloading things from the internet illegally.
Have fun downloading carefree 🙂
Podcast: Play in new window | Download
Subscribe: RSS


